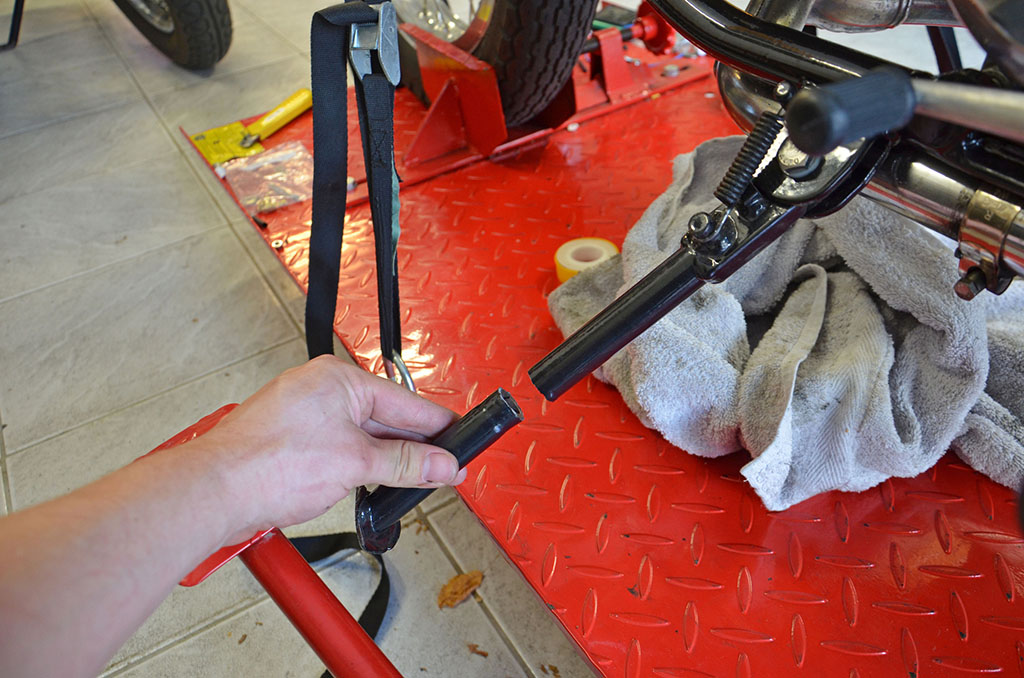
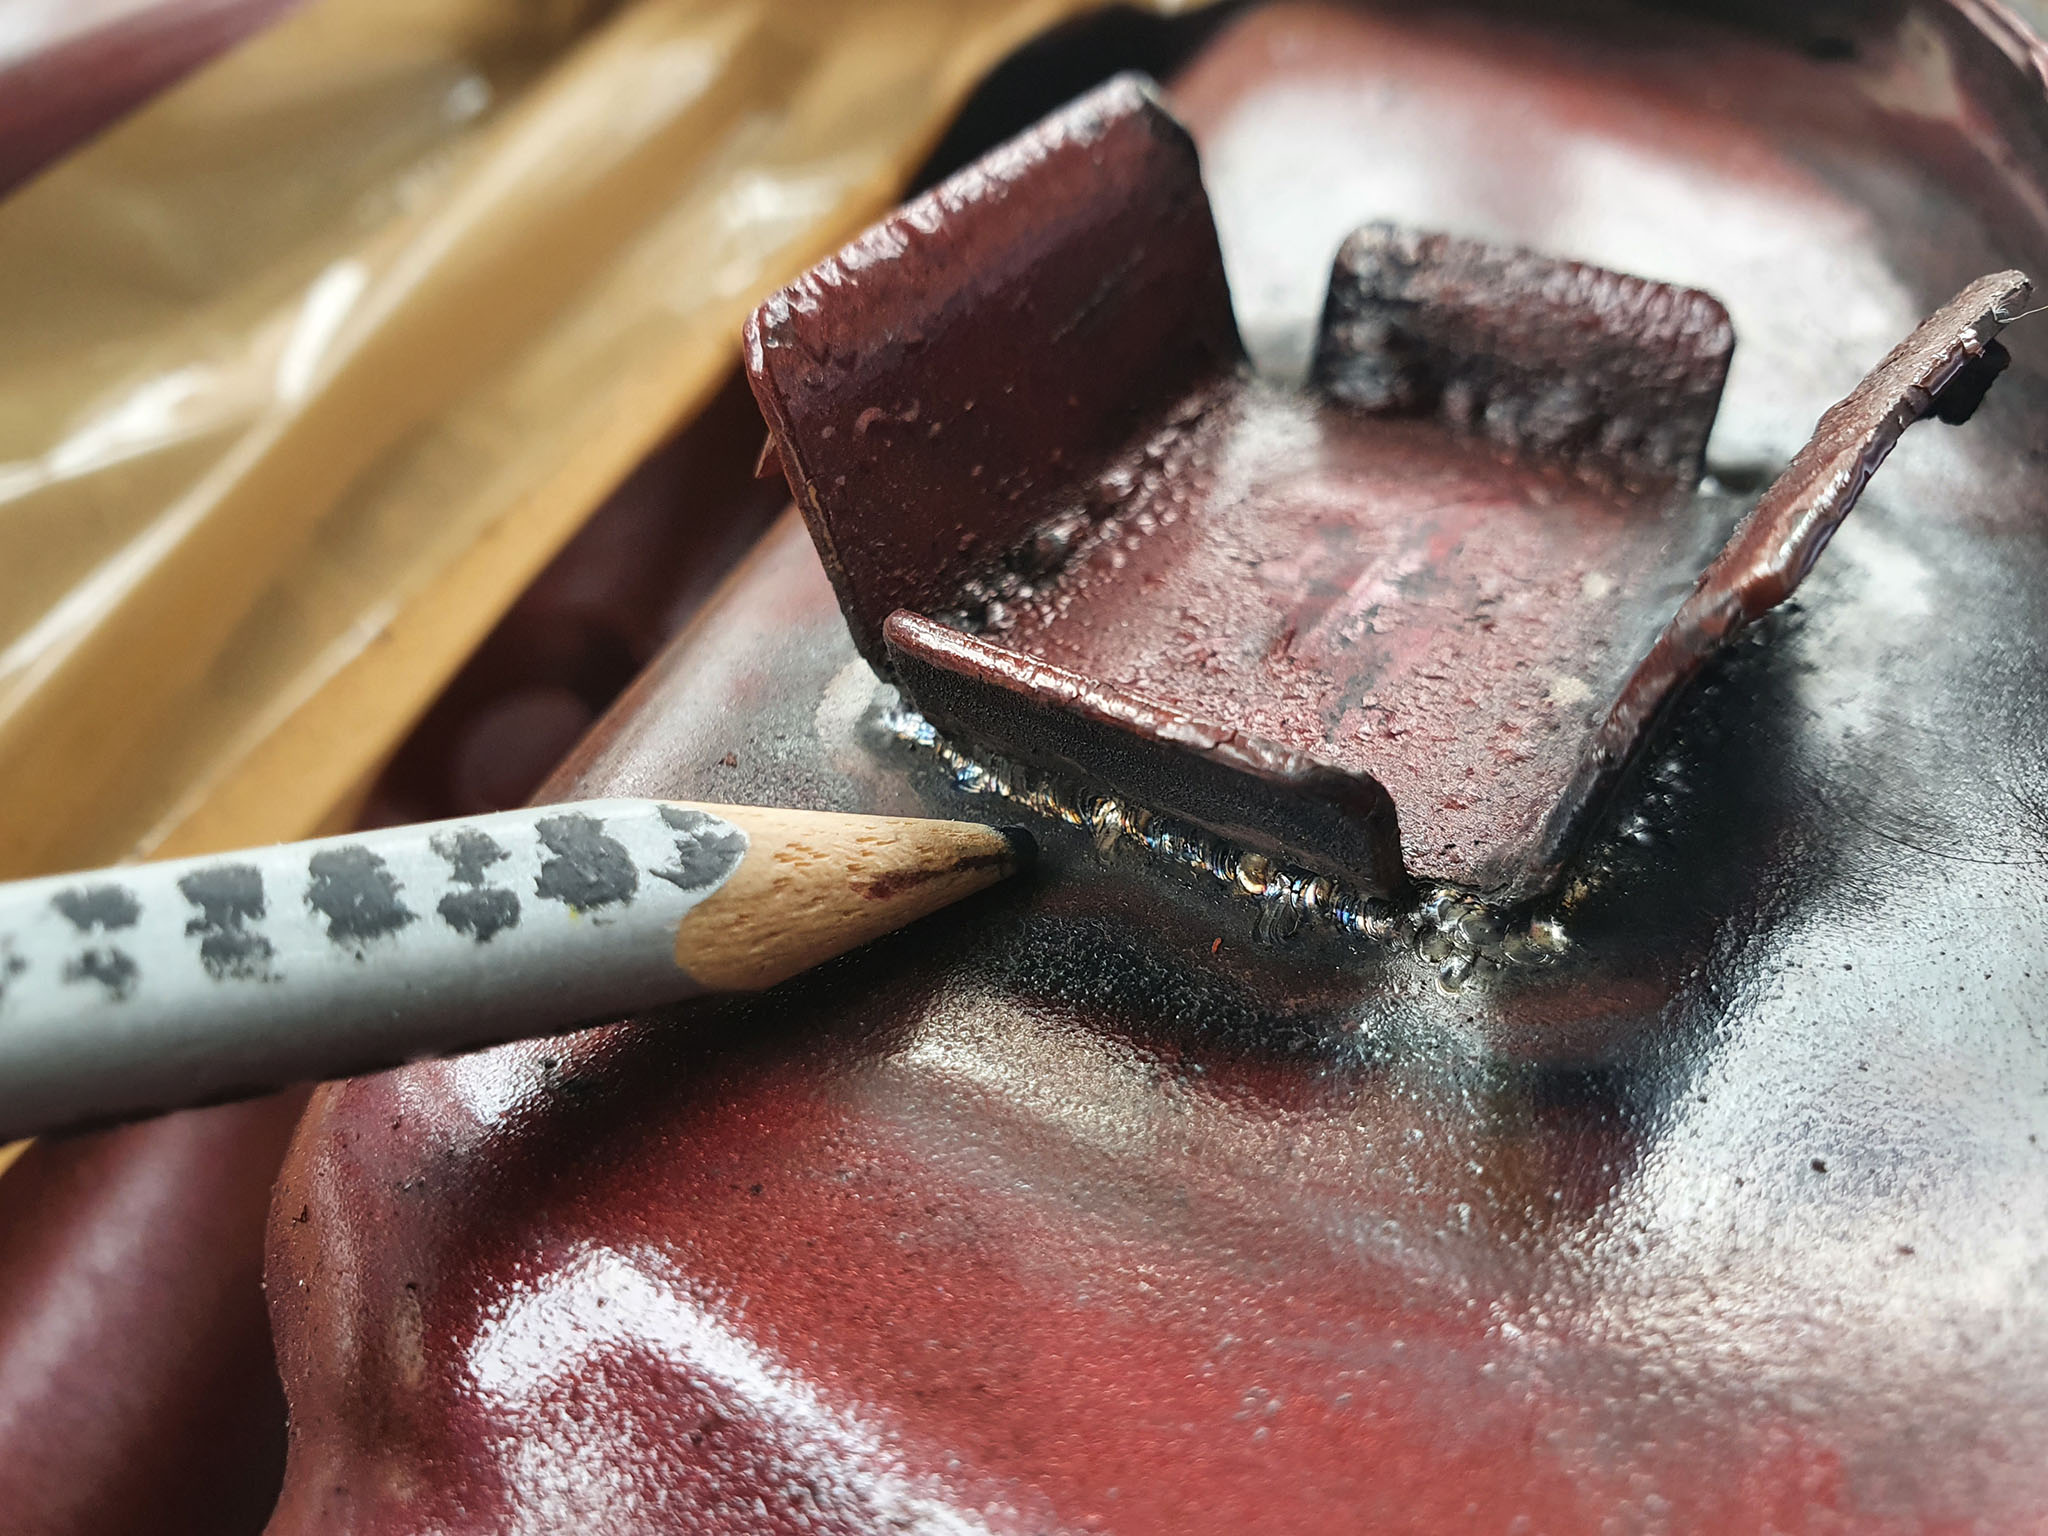
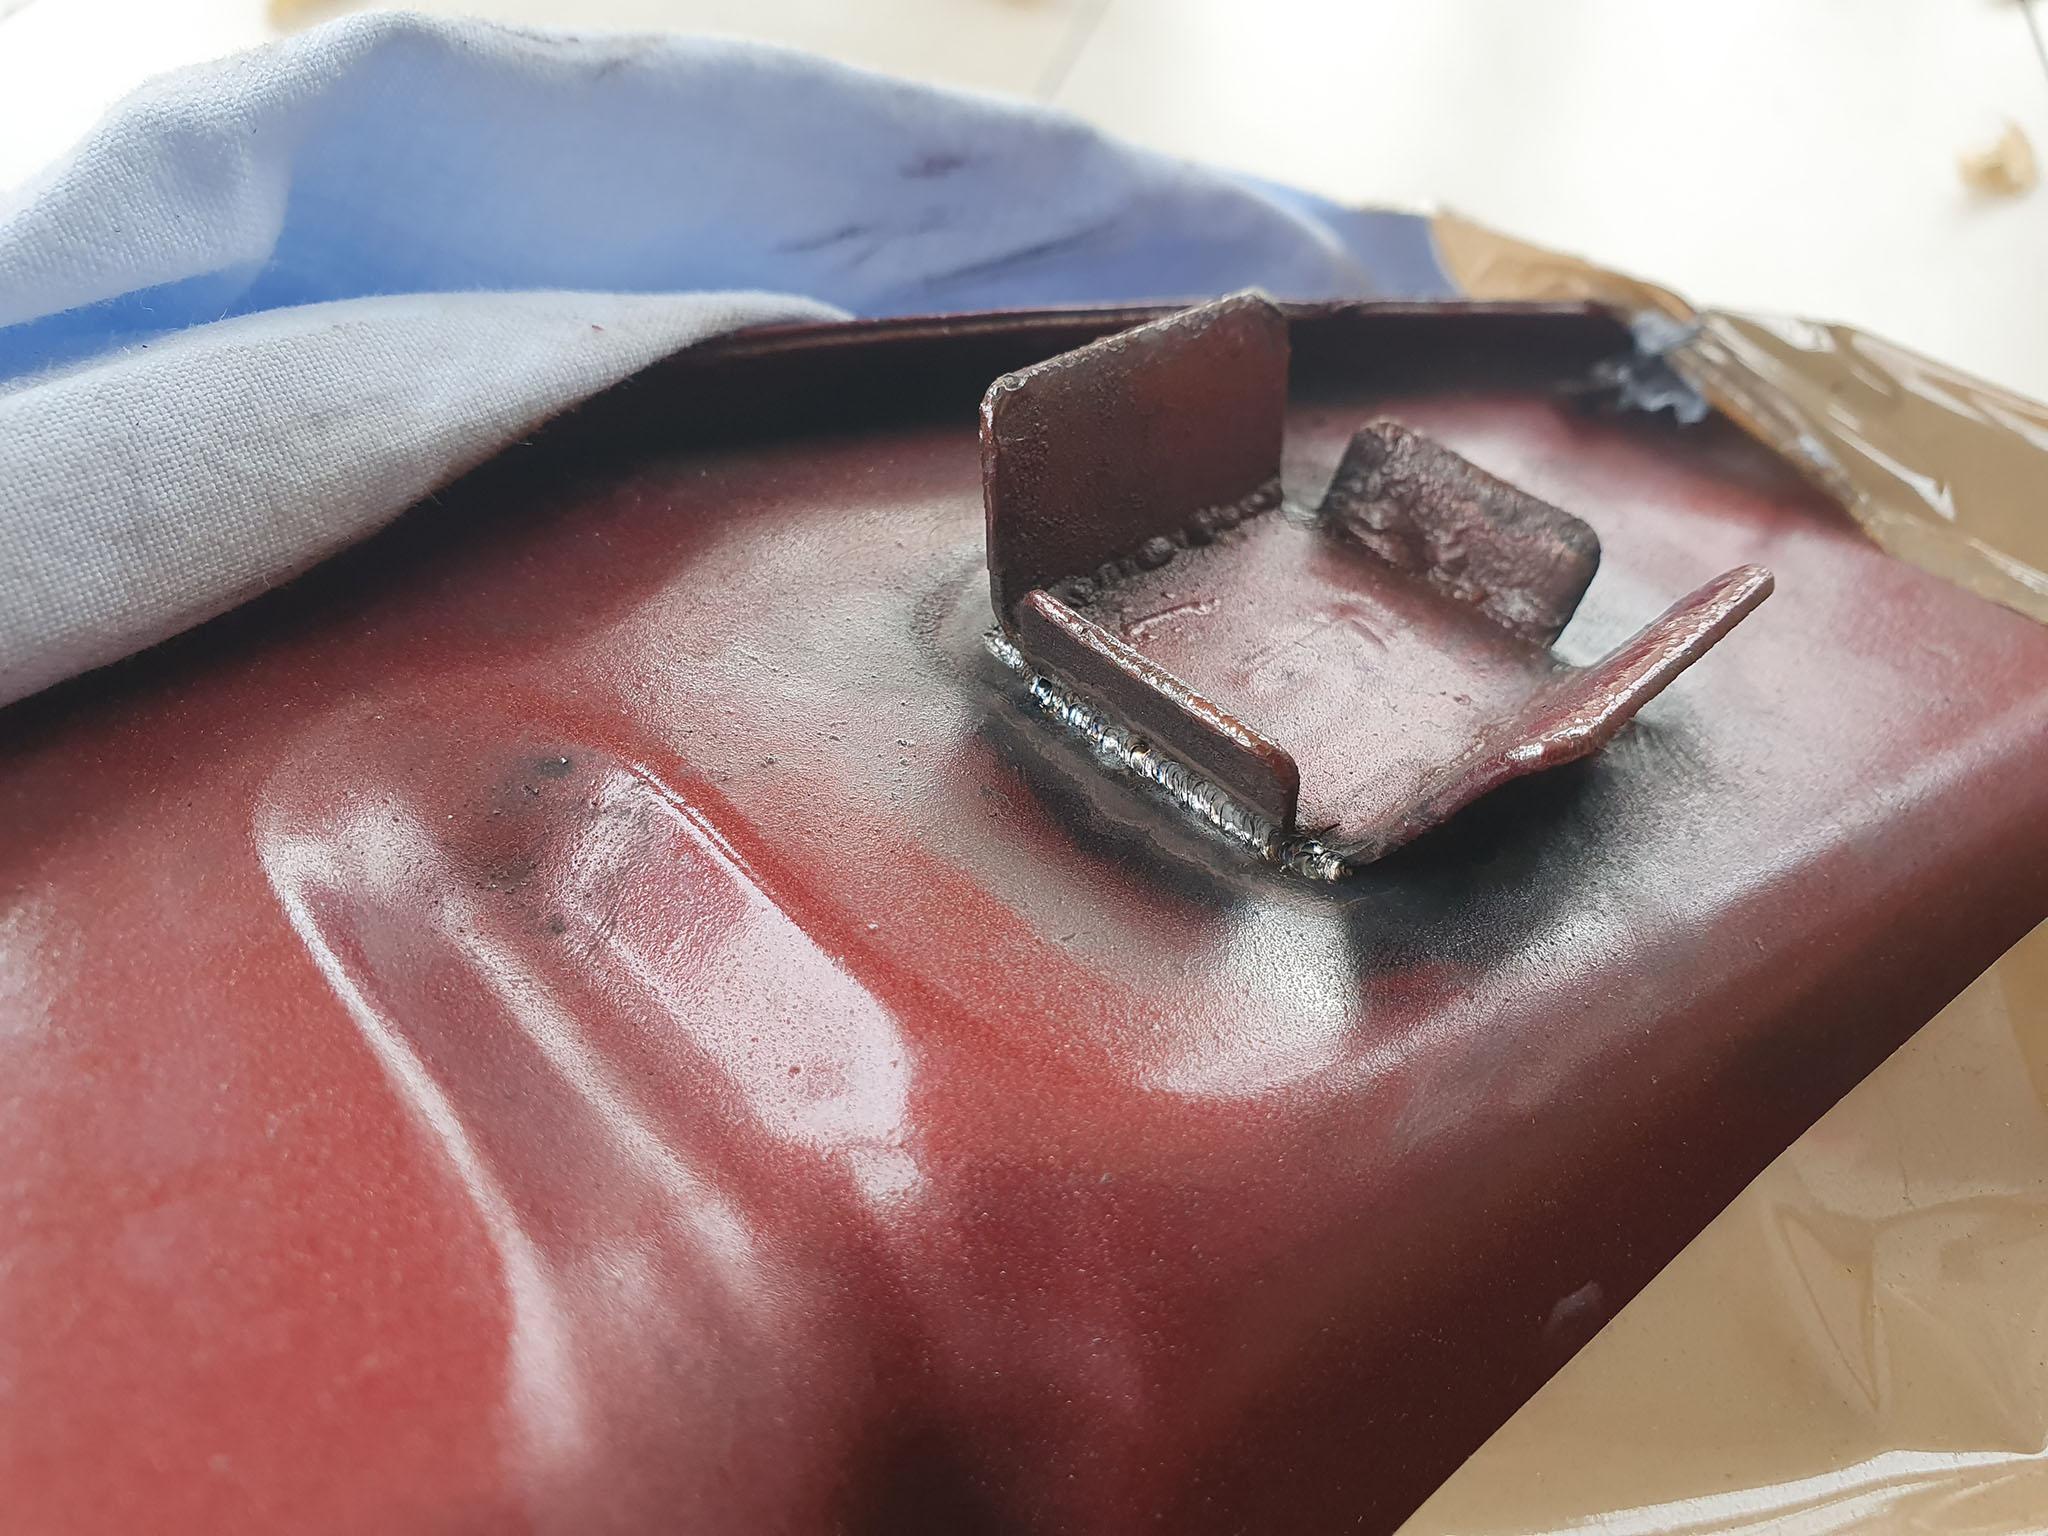
The gas tank was leaking tiny bits of gasoline. I didn’t notice for a very long time as it was sucked up by a rubber block. At some point I noticed that the rubber block was twice as big as it is suppost to be and over some time very small amounts of gasoline dripped to the ground. The source for the leak was on the bottom of the gas tank, where the brackets for the antivibration rubber blokcks are welded to the gas tank. Obviously the metal of the gas tank was weakend by the welding process so it leaked after about 50 years later.
So I went to the a welder company and they laser welded around both brackets without even damaging the paint. It’s now sealed again and probably good for many more years.
Sven’s SS-350 (1974)
Oldtimer Rally Bechhofen 2019
Oldtimer Rally Langenzenn 2018
Ride out with a friend
Litte ride out with a friend. This is somehow an interesting picture as the bikes are so similar but on the other hand so different.
In front the european interpretation of an “Aermacchi” as sports bike with a light frame and without electric start. In the back the US interpretation of the bike as a two-seater vehicle with a large seat and electric starter.
ARSIMA 22nd Raduno
Odd Harley
Test ride
First oil change / First year repairs
- 06/16/2013: First oil change at 120 miles (193 Km) – out HD 20W50 – in Castrol 20W50
- 06/19/2013: Re-Tightened nuts and bolts. Impressive how many became lose after that short period.
- 06/30/2013: The plan was to attend an oldtimer get together and market in Ansbach (mototechnia) which is about 35 miles from my home. I made 2/3 of the way, when suddenly the engine cut off (odometer: 160 miles). Luckily that was very close to Aermacchi parts distributor Rudolf Jungjohann. The error was found quickly: The circuit breaker screw came loose and was damaged, so I had no spark at all. We put a replacement screw in adjusted the timing and the bike did run again. Sadly there was no time left to attend the get together anymore on this day, but I did make it home on the bike without trouble (180 miles)
- 07/07/2013: Believe it or not – the kickstand broke into two parts just out of nothing. (odometer: 213 miles / 342 kilometers) Luckily this happened while in my own driveway and still sitting on the bike. Imagine what could have happened, while the bike resting on the kickstand!
- 07/08/2013: As I can’t ride the bike at the moment because of the broken kickstand, I decided to disassemble the right engine cover again to replace the oil seal for the clutch hub. Reason: I am losing tiny amounts of oil through the dry clutch. This happens because of my own stupidity, I mounted the oil seal with the wrong side facing the oil. I realized that by looking at pictures I did during assembling the engine.
- 07/08/2013: Replaced the tach drive because of a worn out oil seal. I had a NOS one at home already, because I expected that problem.
It’s back on road!
TÜV done
The first step for getting the bike road legal again. I bought the bike without any papers in 2006 and as it was imported in very bad shape from spain it never had any german papers. The officials tested it 2 hours for beeing safe, beeing within noise regulations and so on. I also had them investigating the bike if it is in original condition as it was sold by factory in 1974. a car or bike older than 30 year ins original and very good condition can be registrated as “oldtimer” in Germany which brings some benefits and safes taxes for example.
Ready
I did some pictures of the finished bike. I am very proud. It almost looks like brand new with very tiny cut backs. On one picture you can see my special bike trailer which can be lowered to ground and lifted with an air compressor for easy loading by one person only. I just had to modify it a bit as it is designed for bike bikes with wide wheel base like my HD FXDL. The trailer also has pneumatic shock absortion and I love it. If you don’t use the trailer it can be folded and easily stored in the garage!
Last missing part arrived
Triple Red Macchis
TÜV preparations
It is alive.
Video of first start after more than 6 years of restoration. The bike is already done. Not much to too anymore. Missing CEV169 and tach-drive.
Rewiring the bike
New battery
I have to finish the bike
engine back in frame
Engine done!
How to?
starter clutch chain
Clutch basket and valve adjusting
Grease?
Right side cover
Timing marks
right side reassemble
Polished
Seat done
Seat recovered
Status
Exhaust now complete
Assembling cylinder head
Valve seatings
cylinder installed
Rebored cylinder
Parts coming in
Piston rings
Pistons
Clean cylinder
Chromed handlebar
Sunday bath
Glass bead blasting
New seals
Seat pan
Oil seals
Removing clutch shell
High precision, fine german engineering for a special tool 😉 to open the inner clutch hub nut.
By the way as I have a 74 SS-350 this is the improved alloy clutch hub which was introduced on late 73 models. It can be identified by the higher number of toothes compared to the earlier steel hub. The late version also needs different clutch plates.
Disassembling cylinder head
kickstarter and camshaft
Clutch tool
Spark advance
Headlamp
K&N Airfilter
Bad surprise – cylinder
After some basic cleaning on the cylinder I noticed some bad scuffs in the bore which almost look like they are the result of rust. I somehow have the feeling that even a rebore and oversize piston wouldn’t compensate – maybe a 0.8mm – but looking for a better cylinder and oversize piston seems to be the right thing to do right now.
Stuck on the engine
I am currently stuck on the engine, because I need to buy a 36mm wrench for the sprocket gear, borrow a clutch holding tool, and ordering a puller with longer arms to get the starter sprag off the shaft.
Today I packed the left side engine covers and the handlebar so I can send them out for polishing / rechroming tomorrow. I also have two ugly seat pans which I will bring out for sand blasting and powder coating the upcoming week. I will use the pan that comes out better.
Removing Piston
Removing cylinder
Starter sprag clutch
Circuit Breaker
Removing cylinder head
Starter Motor
Cylinder head
Starter sprockets
Broken pin and chain cover
Removing coils plate
Clutch
Extracting Rotor
A colleague lent me an extractor that worked getting the rotor lose. But somehow I am confused about the shaft, isn’t it supposed to have a notch and a key? Somehow this looks strange. I also learned the hard (hurting way) that it is better to leave the center nut loose on the main shaft when pulling the rotor.
First parts of the head apart
right side cover
As I am stuck on the left side of the engine as I need to buy or borrow a proper extractor to get the alternator rotor off I turned the engine and trying my luck on the right side. Removed clutch cover, circuit breaker cover, oilstick and speedo shaft.
Then again, I am stuck as I need a proper tool for removing the clutch.
Alternator
Draining oil
clutch parts and rubber parts
Alternator Cover
Carb parts arrived
Correct handlebar?
Carb cleaning
After more than 2 years in which I didn’t have the time to work on my bikes, I have decided that I will continue with the SS-350. Well, actually I still do not have a lot of time left as there is still a lot of more important work to do, but I am going to take the time!
I took the carb, disassembled it and cleaned it with the ultra sonic bath and some “DREMEL polishing” and the result is not too bad. The carb was very dirty all over but not damaged as far as I can tell. I have already ordered a few new screws and new gaskets which are still available.
Notes:
- Metering Pin: V10
- Low Speed Jet: 45
- Main Nozzle: 265T /(125)
- Starting Jet: 70